The Midwest sees its share of bad weather, and the harsh environmental conditions can take a beating on your home. One area of home care that is often overlooked is rain gutters. They prevent water damage, roof leaks, pest infestations, foundation issues, and landscaping erosion.
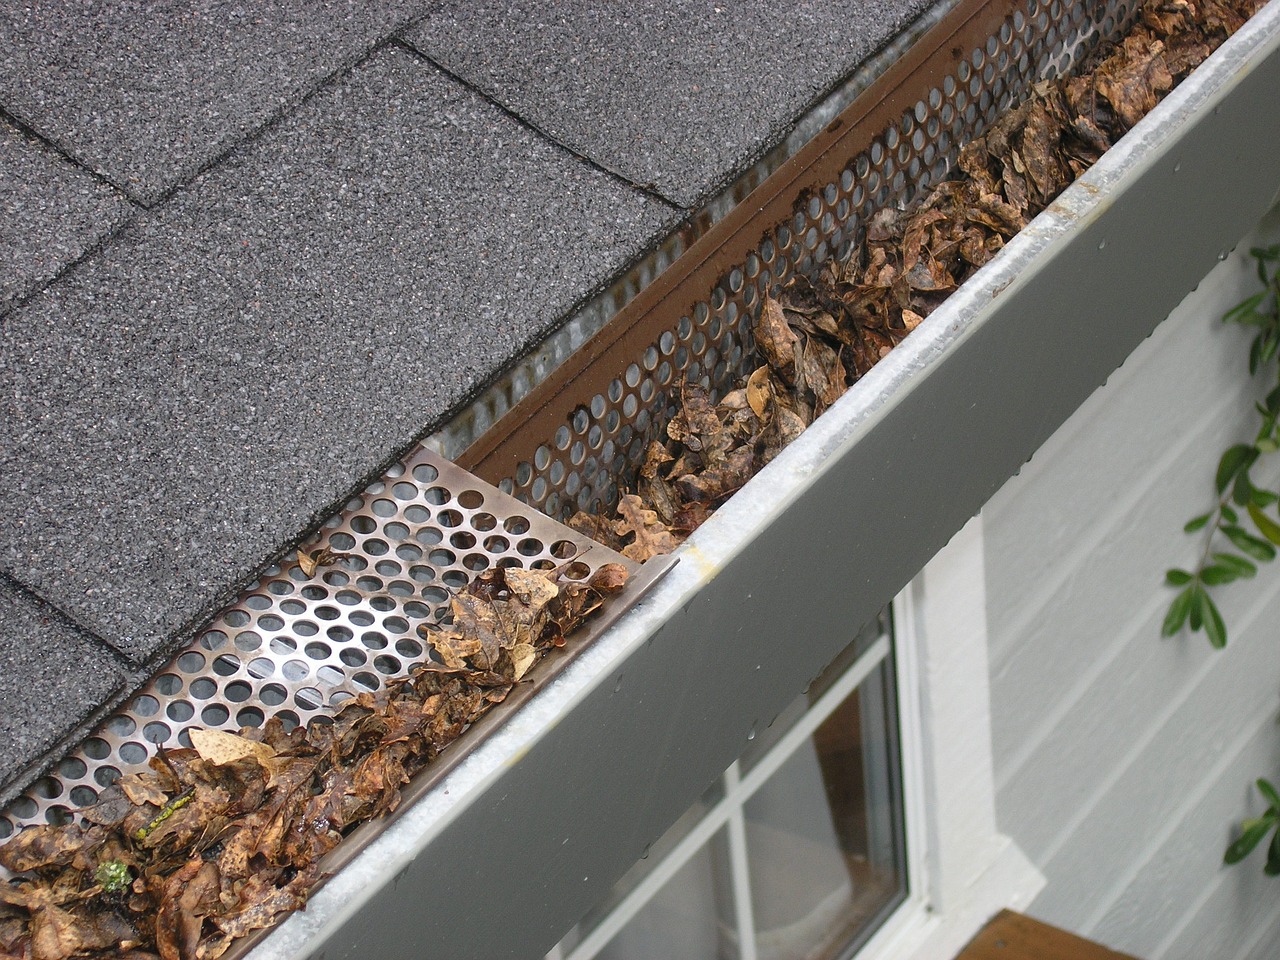
However, when gutters are not cleaned regularly they can get clogged with debris. Just a bit of routine maintenance can keep your gutters doing the job they’re designed to do. Whether you’re a first-time homeowner or a seasonal DIY enthusiast, this rain gutter cleaning guide may save you time, money, and effort.
Step 1: Put Your Safety First
So you’re ready to tackle your gutters, but what do you need? Sometimes homeowners don’t realize the potential hazards of cleaning a gutter. Although it’s a simple task, you need the right equipment and gear to avoid injury. The first must-have item is a ladder. But what kind? Folding or extension? How tall? Does the material matter?
Chris, from Blain’s Farm and Fleet, recommends a 20-foot, aluminum extension ladder. “We sell a lot of aluminum ladders. The aluminum ladder is incredibly light and they’re really strong,” he says. Often people opt for a 16-foot ladder, thinking that’s more than enough height. However, Chris points out why having the extra 4 feet is better. “You need those first four rungs as you’re starting base.”

When using the ladder, place it on a stable, flat surface. If needed, get leg levelers or ladder stabilizers to prevent it from tipping over. When possible, have someone holding the ladder steady and handing you tools.
Additional safety gear should include heavy-duty gloves to protect your hands from sharp debris or pests, safety goggles to prevent dirt and twigs from getting in your eyes, and non-slip footwear. Taking these safety precautions helps ensure the job goes off without a hitch.
Step 2: Remove the Debris
Now it’s time to put those hands to work. If you prefer, you can use a gutter scoop or small tile to begin removing debris. Before starting, have a bucket or trash bag handy for dumping whatever you may find. This makes for an easier post-job cleanup.
The proper way to remove the debris is to start at the downspout and work your way back. You’ll be scooping out leaves, twigs, and dirt. A small towel can be handy when you run into trouble spots you can’t clean with your hands.
While you’re up there wiping out the gutters, take notice of the downspout. Like gutters, they can get backed up with debris. In this situation, a plumbing snake can break up clogs to get the water flowing with ease. An alternative option to consider is buying a downspout filter. Just keep in mind the filter needs a regular cleanup as well.
Step 3: Flush Out the Gutters
There’s only so much cleaning you can do with your hands. Typically, there are remnants left behind. To ensure all debris is removed from the gutters, you’ll need a garden hose equipped with a high-pressure nozzle.
Start at the opposite end of the downspout. This allows you to flush the residue toward the downspout so it flows out and keeps the grime away from your home’s exterior.
Pay attention to how quickly water drains out of the spout. Is it draining slowly? If so, there may be an obstruction inside. Here again, a plumbing snake comes in handy to remove any lingering blockages.
Step 4: Inspect the Gutters
Gutter damage can occur for several reasons. “If you’re leaning ladders on your gutter or if you get a lot of sticks or damage you’ll see the gutter start sagging,” says Chris. If you notice sagging, tighten them up or add gutter hangers.
Also check for leaks, holes, or cracks. If you have one of these issues, apply a silicone-based sealant for leaks or patches for holes. Are your gutters sloping toward the downspout? If so, this can result in improper drainage. The culprit is often loose gutter hangers. Try to adjust them to the correct angle.
Do you see rusted or damaged sections? If this is the case, it’s time to replace those sections. Doing so can prevent additional damage while prolonging the life of your gutters.
Step 5: Take Preventative Measures
Benjamin Franklin said, “An ounce of prevention is worth a pound of cure.” There are actions you can take to keep your gutters clog-free. Taking a proactive maintenance approach could save you from costly repairs down the line. Here are the best practices to follow:
- Install gutter guards to prevent debris from entering while allowing water flow.
- Trim overhanging branches to reduce debris falling into gutters.
- Clean gutters at least twice a year, especially in fall and spring.
- Check for debris and damage after storms.
Keeping Your Gutters in Running Order
Rain gutters do an effective job of keeping your home’s exterior looking good. Keep those gutters up to par by putting your safety first, removing the debris, flushing the gutters, and inspecting for damage. These quick cleaning tips can prevent troublesome clogs.
Keeping your gutters clean is not only important for keeping your home’s interior clean, but also for maintaining your house’s structure. Clogged or damaged gutters can cause water damage, foundation issues, roof leaks, pest infestations, and landscape erosion. Identifying common problems, such as sagging gutters, leaky gutters, improper slope, and clogged downspouts, along with following proper maintenance, is key to keeping your gutters in running order.